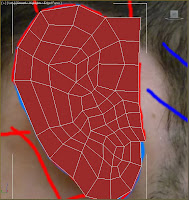
 Using the 'Line' tool, quads were drawn to cover the entire area, which makes up the ear with a small section to the right which connects to the head - this will allow us to attach the ear more easily later.
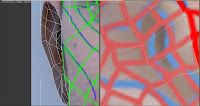
Following this, the ear is then extending outwards to begin forming its 3d shape using the front viewport and reference image.
To add further detail to the ear geometry such as the definitive ridges on the inside of the ear, the 'chamfer' tool allows you to create a border in the interior of the polygon - thus allowing better detail to be created.
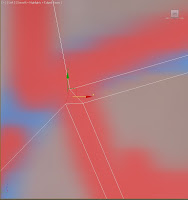
 However, using this feature can create messy corners, resulting in triangles (as the screenshot shows), which is bad practice. To resolve this issue, the edge at the base of the triangles are selected and 'collapsed', again using the collapse tool.
This removes the unwanted triangles and produces a clean set of polygons to work with.
The result from using the chamfer tool can be seen significantly when a turbosmooth modifier is applied to the ear as these images below show. I am very pleased with the result so far!


No comments:
Post a Comment