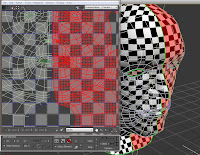
To start, the polygons that were not selected, which consisted of the rest of the head, will be used for the ear's uvw map.


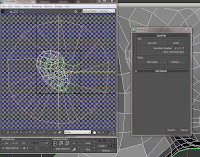
Previously I used the cylindrical method to map the uvw coordinates - however for this type of uv mapping, the 'pelt' tool provides a much better result, allowing you to define the dominant direction of the ear (in this case - the left view).
Hot Tip - remember to add a suitably placed seam to the ear, this allows the image to be flattened more effectively.
Next the pelt editor is used to flatten the ploygons. The 'stretch ring' was first edited to simulate a pulling effect on the vertices, which starts to flatten the image. This is done by using the relax tool alongside the pelt tool.
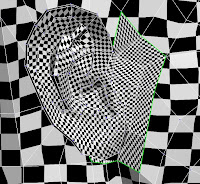
The final UVW map which will be used in photoshop to paint the textures onto.
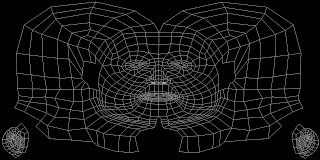

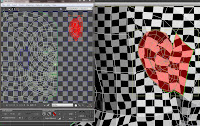
The ear then needs to be positioned seperately from the main head mapping, to reduce the chance of texture overlapping when I apply the texture to the model. The ear map also needs to be scaled correctly to ensure a nice fit in the hole in the head map. The easiest way to do this was to move the ear map over the gap and adjust the vertices as necessary.

After doing this, the flow of polygons around the ear can be clearly seen, a nice smooth flow which is perfect for texturing!

Finally, before any texturing can be started, the head and ear mapping needs to be mirrored in the UVW map editor, which will cover the other side of the head. This also allows us to paint the texture on both sides of the model. The most important step here is to align and weld the two maps together correctly to prevent any ripping in the texture.

The final UVW map which will be used in photoshop to paint the textures onto.

No comments:
Post a Comment